1. Understanding Your Skin Type: The Foundation of a Natural Skincare Routine
Before diving into specific products or techniques, accurately identifying your skin type is paramount. A routine designed for oily skin can exacerbate dryness, and vice-versa. The four primary skin types are:
-
Normal Skin: Characterized by balanced oil production, small pores, and a smooth texture. Rarely experiences breakouts or sensitivity.
-
Oily Skin: Defined by excess sebum production, often resulting in enlarged pores, a shiny complexion, and susceptibility to blackheads and acne.
-
Dry Skin: Lacks sufficient moisture, leading to tightness, flakiness, and a rough texture. Prone to irritation and premature aging.
-
Combination Skin: Exhibits characteristics of both oily and dry skin. Typically, the T-zone (forehead, nose, and chin) is oily, while the cheeks are dry or normal.
To determine your skin type, wash your face with a gentle cleanser and pat it dry. Wait approximately 30 minutes without applying any products. Observe how your skin feels. If it feels tight and uncomfortable, you likely have dry skin. If it appears shiny, especially in the T-zone, you probably have oily or combination skin. If it feels comfortable and balanced, you likely have normal skin. Pay attention to how your skin reacts to different environmental factors, such as humidity and temperature, as these can also influence your skin type.
2. Natural Cleansing: The First Step to Radiant Skin
Cleansing is essential for removing dirt, oil, makeup, and pollutants that accumulate throughout the day. Opt for a gentle, natural cleanser that won’t strip your skin of its natural oils.
-
Oily Skin: Look for cleansers containing ingredients like tea tree oil, lemon juice, or witch hazel, known for their astringent and oil-controlling properties. A gel or foaming cleanser is generally preferable. A simple DIY option involves mixing a teaspoon of raw honey with a few drops of lemon juice.
-
Dry Skin: Choose a creamy or oil-based cleanser with moisturizing ingredients like shea butter, coconut oil, or aloe vera. Avoid harsh sulfates or alcohols. Consider using the oil cleansing method, which involves massaging an oil blend (such as olive oil and castor oil) onto your face, followed by wiping it off with a warm, damp cloth.
-
Normal Skin: A gentle, pH-balanced cleanser with ingredients like chamomile, rosewater, or green tea extract will maintain the skin’s natural balance.
-
Combination Skin: Experiment with different cleansers to find one that effectively cleanses the oily areas without drying out the drier parts. A clay-based cleanser used selectively on the T-zone can be beneficial.
Apply the cleanser to damp skin and gently massage in circular motions for about a minute. Rinse thoroughly with lukewarm water and pat dry with a soft towel. Avoid harsh scrubbing.
3. Exfoliation: Unveiling a Brighter Complexion
Exfoliation removes dead skin cells, revealing a smoother, brighter complexion and allowing skincare products to penetrate more effectively. Limit exfoliation to 1-2 times per week to avoid irritation.
-
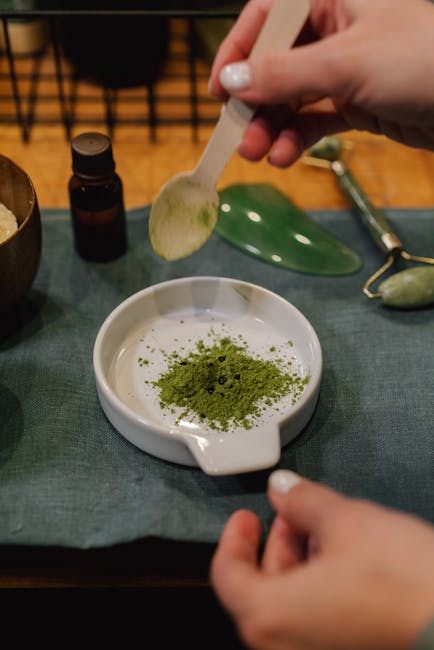
Physical Exfoliants: These involve using a textured material to manually remove dead skin cells. Natural options include finely ground oats, almond meal, sugar, or a soft facial brush. Mix a tablespoon of your chosen exfoliant with a small amount of water, honey, or yogurt to create a paste. Gently massage onto damp skin in circular motions, avoiding the delicate eye area.
-
Chemical Exfoliants: These use natural acids to dissolve the bonds between dead skin cells. Alpha hydroxy acids (AHAs) like lactic acid (found in yogurt) and glycolic acid (derived from sugar cane) are effective for improving skin texture and tone. Beta hydroxy acids (BHAs) like salicylic acid (found in willow bark extract) are beneficial for oily and acne-prone skin as they can penetrate pores to remove excess oil and debris. A simple DIY AHA exfoliant involves applying plain yogurt to the face for 10-15 minutes.
After exfoliating, rinse thoroughly and apply a moisturizer.
4. Toning: Balancing the Skin’s pH
Toner helps to balance the skin’s pH after cleansing and prepares it for subsequent skincare products. Natural toners are often infused with beneficial ingredients.
-
Apple Cider Vinegar Toner: Dilute apple cider vinegar with water (1 part vinegar to 2 parts water). Apply to the face with a cotton pad after cleansing. Apple cider vinegar helps to balance pH, reduce inflammation, and brighten the skin. However, perform a patch test first as it can be irritating for sensitive skin.
-
Rosewater Toner: Rosewater is a gentle and hydrating toner that helps to soothe and calm the skin. It has anti-inflammatory and antioxidant properties. Simply spritz rosewater onto the face after cleansing.
-
Green Tea Toner: Brew a cup of green tea, let it cool, and then apply it to the face with a cotton pad. Green tea is rich in antioxidants and can help to protect the skin from damage caused by free radicals.
-
Witch Hazel Toner: Witch hazel is an astringent that can help to tighten pores and control oil production. Choose an alcohol-free witch hazel to avoid drying out the skin.
5. Serum Application: Targeted Treatment
Serums are concentrated treatments that deliver specific ingredients to the skin.
-
Vitamin C Serum: Vitamin C is a powerful antioxidant that can help to brighten the skin, reduce hyperpigmentation, and protect against sun damage. Look for serums containing L-ascorbic acid, a potent form of vitamin C.
-
Hyaluronic Acid Serum: Hyaluronic acid is a humectant that attracts and retains moisture, plumping up the skin and reducing the appearance of fine lines.
-
Niacinamide Serum: Niacinamide (vitamin B3) helps to reduce inflammation, minimize pores, and improve skin tone.
-
Retinol Serum (Use with caution): While not strictly “natural,” some plant-derived alternatives like bakuchiol offer similar benefits for anti-aging without the potential irritation of retinol. If choosing retinol, start with a low concentration and use it sparingly at night.
Apply a few drops of serum to the face and neck after toning, gently patting it into the skin.
6. Moisturizing: Hydration is Key
Moisturizing is essential for maintaining the skin’s hydration levels and protecting it from environmental aggressors.
-
Oily Skin: Choose a lightweight, oil-free moisturizer or gel-based formula that won’t clog pores. Ingredients like aloe vera and hyaluronic acid are hydrating without being greasy.
-
Dry Skin: Opt for a rich, creamy moisturizer with emollient ingredients like shea butter, cocoa butter, or avocado oil.
-
Normal Skin: A lightweight moisturizer with ingredients like jojoba oil or squalane will maintain the skin’s balance.
-
Combination Skin: Use a lighter moisturizer on the oily areas and a richer moisturizer on the dry areas.
Apply the moisturizer to the face and neck after serum application, gently massaging it into the skin.
7. Sun Protection: The Most Important Step
Sun protection is crucial for preventing premature aging, sun damage, and skin cancer. Use a broad-spectrum sunscreen with an SPF of 30 or higher every day, even on cloudy days.
- Mineral Sunscreens: These contain zinc oxide or titanium dioxide, which are physical blockers that reflect UV rays. Mineral sunscreens are generally considered safer and less irritating than chemical sunscreens.
Apply sunscreen liberally to the face and neck at least 15 minutes before sun exposure. Reapply every two hours, or more frequently if swimming or sweating.
8. Targeted Treatments: Addressing Specific Concerns
In addition to the basic routine, you can incorporate targeted treatments to address specific skin concerns.
-
Acne Treatment: Spot treat blemishes with tea tree oil, bentonite clay masks, or diluted apple cider vinegar.
-
Dark Circle Treatment: Apply a cold compress or use products containing caffeine or vitamin K.
-
Hyperpigmentation Treatment: Use products containing vitamin C, licorice root extract, or alpha arbutin.
9. Lifestyle Factors: Nourishing Your Skin from Within
A healthy lifestyle is essential for maintaining healthy skin.
-
Hydration: Drink plenty of water throughout the day to keep the skin hydrated.
-
Diet: Eat a balanced diet rich in fruits, vegetables, and healthy fats.
-
Sleep: Get adequate sleep to allow the skin to repair and regenerate.
-
Stress Management: Practice stress-reducing activities like yoga, meditation, or spending time in nature.
10. Patch Testing: Ensuring Product Compatibility
Before incorporating any new product into your skincare routine, perform a patch test to check for allergic reactions or sensitivities. Apply a small amount of the product to a discreet area of skin, such as the inside of your wrist or behind your ear. Wait 24-48 hours and observe for any signs of irritation, such as redness, itching, or burning. If you experience any adverse reactions, discontinue use immediately.